Here are some ideas about fencing and movement. Most come from the discipline of Alexander Technique that I have been studying for several years. Clearly it’s easier to convey these concepts in person, but along with some of the exercises, hopefully you will find this material useful.
Alexander technique is a methodology for teaching people how to use their bodies efficiently (in Alexander terminology “developing good usage”). An important objective is to help eliminate excess tension so that the body returns to a natural posture using the correct muscles for support. Of course this can be incredibly useful to fencing–as it is for any other movement. Think of parries that are too big, extensions that are too stiff, or movement that is awkward and out of balance. A good Alexander teacher will be able to solve any of these problems and more. Unfortunately, Alexander technique is not well known in the world of sports. It’s much more likely that actors and musicians will know what it is, since it is taught in acting schools, and musicians with injuries will seek out an Alexander teacher. If you are interested in Alexander technique in the Philadelphia area I would recommend several teachers that I have worked with. Jano Cohen in Wynnewood [email protected] (610/649-8142.) and Anne Johnson (215/843-1555) [email protected] in Chestnut Hill. To learn more or to find an Alexander teacher world wide go to
www.ati-net.com
Always In Movement
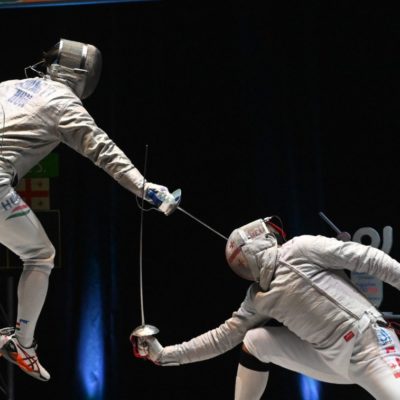
In fencing (and in other sports) it’s easy to think that you have to tighten or somehow get prepared to move. There’s something that feels good about exerting a lot of effort to lunge or retreat or even to thrust. The reality is that if you tighten to move then it takes longer to get started. The quickest most efficient movement actually comes when you’re not set but already in movement. When you watch Pete Sampras play tennis or Golubitsky fence, the movement seems soft and easy, without much effort.
Exercise: To test yourself, get on guard try moving all your joints a bit to ensure that you haven’t added more muscular effort than necessary. Can your elbow bend easily, is there the ability to move at your shoulder joint? Have a partner move your arm around. Can you let go and let them move your arm freely? To test your legs get on guard and just straighten and bend them a little (slowly) to see if the movement is easy and effortless. Are you allowing all your leg joints (hips, knees, ankles) move freely. See what it’s like to advance or lunge from this place. Now try tightening your muscles. What’s it like to advance or lunge now? Be aware that when you start to make these changes, you may experience more physical ease, but it might not feel all that great. We are so accustomed to excess effort, that this new condition may not feel right. Try and trust that if you keep working toward more ease that it will help your fencing. You will begin to move more quickly and be able to react to changing circumstances more quickly.
Note: While doing this and any other exercise remember your trying to get feedback from your sensations vs. telling your self to get in any specific position. This is a crucial point. This process is about learning to pay more attention to the feedback that is in your body and trusting that your body has something to teach your head versus using your head to order your body around.
Weight In The Floor
There isn’t a saying that I use more when teaching fencing. The only way to explain this is to try the following exercise.
Exercise 1: Try getting on guard and then tighten your whole body, now release. Notice that when you tighten your weight doesn’t feel like it goes through your legs into your feet and into the floor. When you release, you feel the floor much more. Staying connected to this grounded feeling is one of the simplest ways to help yourself stay more relaxed and at the same time in the present.
Exercise 2: This one might seem a little strange but it’s a great way to get grounded. Start lying on the ground flat on your back. Think about letting your whole weight sink into the floor. Now roll to your side and think again about sinking. Roll back to your back and sink again. Now go up to your knees and back to the floor. Try again up to your feet but crouching. Finally stand all the way up. In each position and while your making transitions keep thinking about gravity and the incredible support that you get from the ground. By the time you’re standing, you will probably feel like nothing can knock you over.
Fencers Tend To Grab At The Hips
My guess is that many fencers grab at the hips to attempt to get their balance. The reality is that your balance will be a whole lot better if the joints stay soft and you adjust your balance by bending at the hips, knees and ankles.
Exercise. With a friend have one person stand on guard with relaxed soft joints while the other person gently pushes the fencer in different directions. It is quite typical for the fencer to try and retain balance by bracing against the force. Instead, try moving with the push and retaining balance by making adjustments in the joints, especially the hips, knees and ankles.
I Wish My Head And Neck To Be Free
This is a classic Alexander suggestion. If your head is not balanced and moving freely over your torso, your spine will be out of alignment, and it will be difficult to have full freedom of movement in your arms and legs. Most people tighten the back of the neck shortening the neck and lifting the chin. As your neck frees your head rolls forward, comes back over your torso and your neck lengthens. When you move in fencing you would like your head to stay in this balanced position with no tension. When this is the case you can say that your head moves first as you advance or retreat. In Alexander terms when you advance they say your head moves forward and up. The reality is that in most movement the spine lengthens and widens. Just look at a cat move across a room and you will see that.
An important part of understanding this suggestion, is understanding where your head ends and your neck begins. The joint is located behind your ears. Many people perceive the joint somewhere lower than that. Try touching your ears and visualizing the joint in the middle, and bend your head forward and back.
Exercise: Take some time and look in a mirror. Stand sideways and see if your chin is up or your head seems pushed forward. Experiment with trying to find tension in your neck, releasing it and see where your head moves to. Think about the weight of your head, see if you can find a balance point where it takes the least amount of effort to balance your head over your torso. Experiment: send it forward backward and even sideways. Also try lifting and dropping your chin and see which position requires the least effort.
Good Movement Begins From Getting On Guard Correctly
Getting on guard primarily involves bending the legs by releasing the ankles, knees and hips. When your knees bend they go way forward. Your pelvis, which is angled forward when standing upright, straightens when the knees are bent. The spine straightens and the lower back should feel good because it lengthens. Most fencers do not ever get into this optimal position. They will either not straighten the pelvis (which results in an image of the buttocks sticking out) or they don’t bend at the hip joint enough (which appears as a tucking the hips forward.) Many fencers never think about the ease of movement in their knees or ankles either.
Exercise: You need a mirror and your hands. Stand sideways to the mirror with your feet pointing forward and shoulder width apart. Put one hand on your lower abdomen and the other at the base of your spine. Begin to release your hips knees and ankles. As you begin the movement do your buttock release down (as your pelvis straightens)? Is your abdomen dropping straight down or is it going forward. If it goes forward, you are probably not bending at the hips enough. Also as you bend your knees, be sure to think up with your torso. You want to lengthen your whole torso, not push it down into your legs (a common problem in fencing). Once you feel that this is easy, try it again in an on guard position.
Fencing And Walking
I never thought much of the relationship between the movement of fencing and walking. When walking the front hip releases as the knee and ankle bends. This allows the foot to swing forward freely without having to disrupt the pelvis (can stay level). As applied to fencing, this means that when moving the front foot on the advance, the front heel comes off the ground slightly as the hip releases and front knee bends (going forward–not up). From here the front foot can swing forward just as with walking without disrupting the pelvis. Unfortunately many fencing teachers emphasize sending the heel forward first. Doing this requires lifting the entire leg–a much more strenuous and awkward movement. Try walking this way to see how difficult it is. Moving the back leg seems to be more difficult for fencers because of the direction of the knee. Here, the beginning of the movement is the same as the front foot, release the hip knee and ankle. Then the back foot can come up without lifting the back hip (a common problem).
Exercise: Try to get the connection between walking and fencing in three steps. First stand in a mirror with your feet shoulder width apart ready to walk. Walk a few steps and see what you notice. Now looking in the mirror isolate the beginning of the step which means release the hips, knees and ankles then swing the leg forward. Take some slow steps working with the release at the beginning of the step. Now bend your knees a bit and try walking again. After a little practice you should be able to get the same ease that you do when you walk. Now your ready to try an on guard position, releasing then swinging the front leg, then releasing and bringing up the back leg.
Lunging
Leaning forward on the lunge is such a common problem. It seems to me that most of the time the problem is related to the use of the front leg. Just as we discussed with the advance, the lunge begins by releasing the hip knee and ankle so that the front foot can swing forward freely. If there is no separation, then the torso goes out with the front leg making leaning forward inevitable.
Exercise: To experiment with the movement, take a big step forward in a lunging position. Keeping your torso in between your legs go forward and back in and out of the lunge. Stay on a level plane, which requires bending the back hip as you recover from the lunge. Now try the lunge, and just like the advance the key is the release then the front leg can swing forward. As you look in the mirror, is your back hip still bent (pelvis is level) on the way out and on the way back? Also, instead of stopping in the lunge try making the movement one long slow action, at no point grabbing to stop.
What’s Going On In My Back
In fencing (and other sports) it is easy to think about what’s going on in front at the point of contact. This emphasis on forward in some ways explains leaning forward, and shortening and narrowing in the front. It also partially explains leaning over in the lunge. It is extremely helpful to pay attention to your back, back arm and back leg. Sometimes when I fence I concentrate almost entirely on my back and back leg. When I do this I feel balanced and able to recover from the lunge better.
Exercise: Try fencing in the mirror or actually on the strip thinking about staying as wide and as upright as you can the whole time. Give yourself the suggestion, keep your back back as you advance or lunge. As you bend your knees to get on guard think up as you go down, and when you retreat think forward as you go back.
Allowing Your Arms To Move
The upper arm (humerus) is connected to the collar bone in front and the scapula in the back. This structure is not connected to the ribs–even though many people move their arms like they are. One useful thought is can you make more space between the arm structure and the ribs. Fencers tend to pull their arm (especially the front arm) down from the latisimus muscles. Somehow pulling the shoulder down makes you feel like you’re more “into it”. This pulling down gets in the way of the freedom of movement in the arm. Also proper arm movement requires proper support from the rest of the body. This is hard to explain but it’s easy to show you. One way to say it is that if you are upright, supporting your weight through your spine, and letting the weight go through your pelvis and legs to the floor, your arms are then properly supported and can be used better. I find one incredibly useful correction for working with the extension. I say, can you extend your arm without disrupting your spine or lifting up off your legs. This seems very useful.
Bone Structure Of The Arm
When the arm extends the collar bone (which is part of the arm) should raise slightly and the scapula rotates. Fencers with what we refer to as tight shoulders generally do not allow enough movement in either bone.
Exercise: Experiment by raising your arm up over your head and see whether there is any movement in your collar bone. If there isn’t much, see if you can allow more. Also, work with a friend and feel how the scapula moves when he or she extends their arms up over the head.
The Extension
When extending the muscles that have to do some work are the tricep. I often make the suggestion, extend using the muscles under the arm.
Exercise: Lie down and pay attention to where the scapula touches the ground. Extend your arm up (like you would if were standing and extending) and pay attention to keeping the scapula on the ground. Let the movement be supported by your whole back. Now try standing and extend the same way, keep your back back as you extend forward.
Conclusion
Using these concepts have been very helpful teaching fencing. Today, instead of focusing on technique in isolation, I concentrate more on developing better body usage. I do this because I now realize that I can’t fix the technique until I work with the underlying usage issues. Also, once usage is improved, teaching technique is easy, and comes with many fewer repetitions. Even more important to me, is that the student leaves having better kinesthetic awareness and some tools to tackle their next movement experience.


